HubNet Web FAQ
Why use HubNet Web?
There are multiple facets to that question, as HubNet Web combines the qualities of NetLogo, NetLogo Web, and HubNet, and adds some of its own ideas on top of those.
Why use NetLogo? Because you want to build or explore simulations in a time-tested framework that allows that is relatively easy to program in, while providing a powerful suite of tools to modeling and understanding phenomena.
Why use HubNet? Because you want to your model to be a multi-user participatory activity. Put another way: because you want to turn your NetLogo model into a multiplayer game of sorts.
Why use NetLogo Web? Because you want access to the power of NetLogo within a web browser. Because you don't want people who use your models to need to install the NetLogo desktop application. Because you want to be able to directly link someone to your model so they can frictionlessly open it and run it.
Why use HubNet Web? Because you want to combine the functionality of HubNet with the advantages of NetLogo Web. Because you want access to a more approachable authoring experience than traditional HubNet offers. Because traditional HubNet is too restrictive in activity format. Because you want people outside of your LAN to be able to connect to your activity.
Choosing an activity from the library
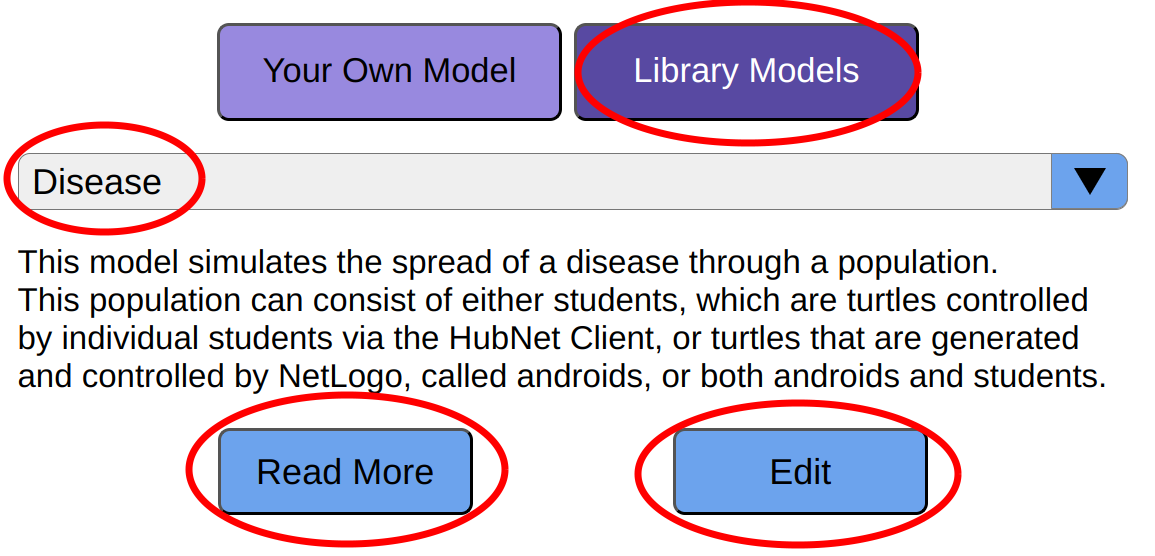
On the Host page, and make sure that "Library Models" is selected, towards the top-left. Then, find the activity selection dropdown, which typically starts with the "Disease" model selected. Click the dropdown and choose any activity from the list. Upon doing so, a preview image and description for the model will be displayed. You can click "Read More" for a fuller description of the activity. Clicking the "Edit" button will open the selected library model in the authoring tool. More information on how to launch the activity can be found below.
Uploading your own activity
In order to upload your own activity for use in HubNet Web, it must first be configured to run in HubNet Web. Properly configured models must take the form of either a .nlogo file with an accompanying .json file, or as one single .hnw.json file. If all you have is a .nlogo file, then your model has not been configured yet. You can perform the conversion by following the instructions in the "Converting an existing model" section of this page.
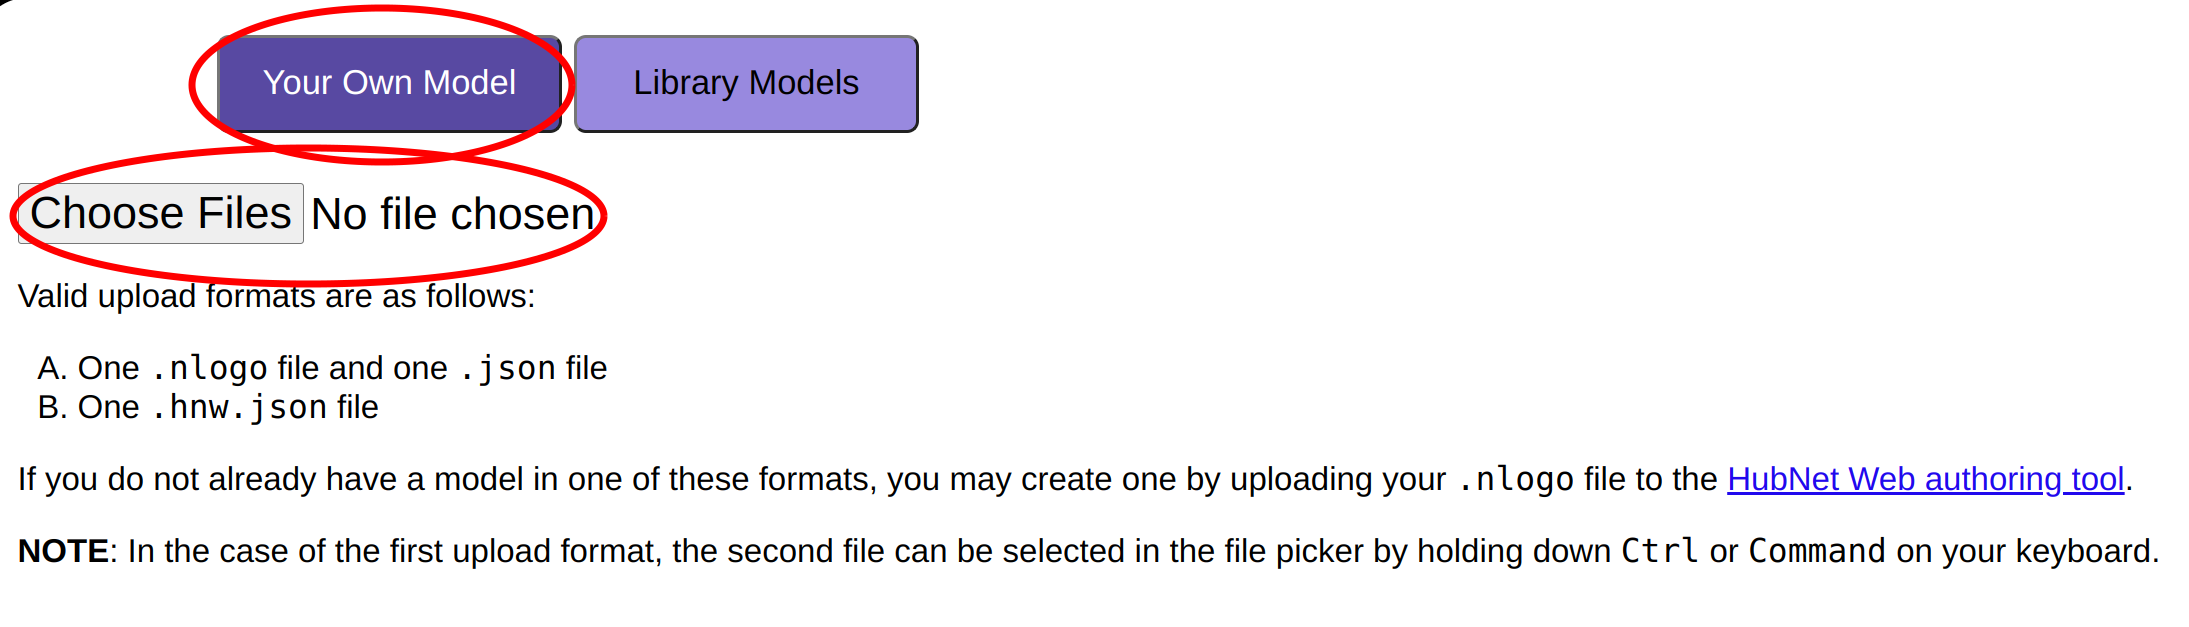
Once your model is ready to use in HubNet Web, head to the Host page and press the "Your Own Model" button towards the top-left of the screen. Now, you must select the file(s) to upload. Select the file input (which, depending on your web browser, might say something like "Choose Files"), and navigate through your computer's file browser to find your model. If your converted model takes the format of a .nlogo file with a .json file, you will need to use Ctrl or Command on your keyboard, in order to select both files in the file browser.
Launching an activity for others to join
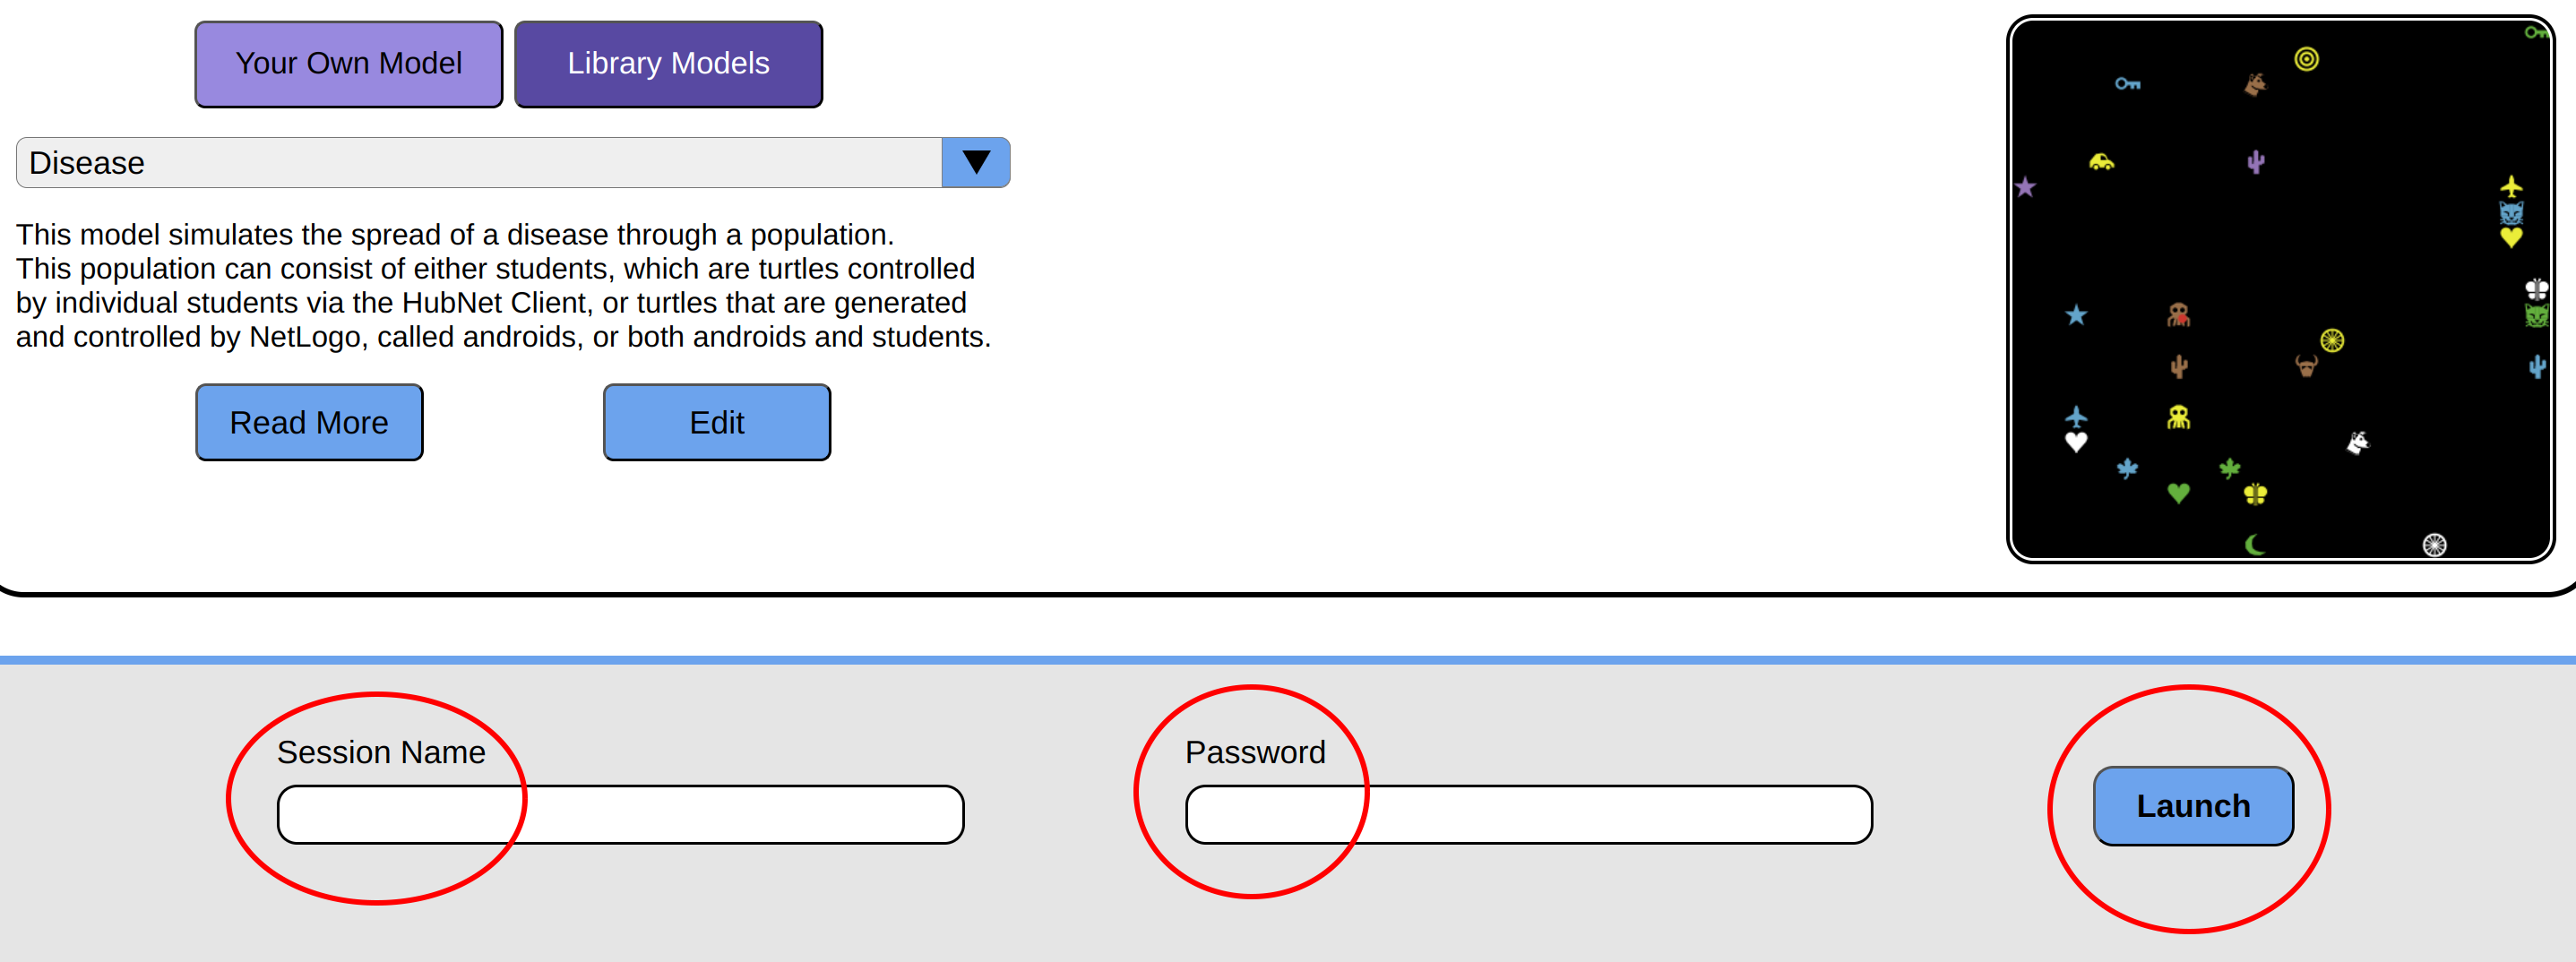
Once you have selected the activity that you want to run on the Host page, fill out the "Session Name" input towards the bottom of the page. What you type into this field will be shown to other users, to help them identify your session, so you may find it helpful to give your session a unique name. There is also an optional "Password" field, which you can use to limit people's access to your session. Once you have filled in both fields to your liking, click "Launch".
Joining an activity
There are two ways to join an activity.
The first way is with a direct link. In order to obtain a link to a session, its host must click the "Copy Invite Link" button in the top-left of the page, after launching their session. Then, they can share that link with others. Upon clicking the link, the user's browser will open a tab that will pop up some dialog boxes for a username (and, optionally, for a password), and then the user will be automatically connected to the activity.

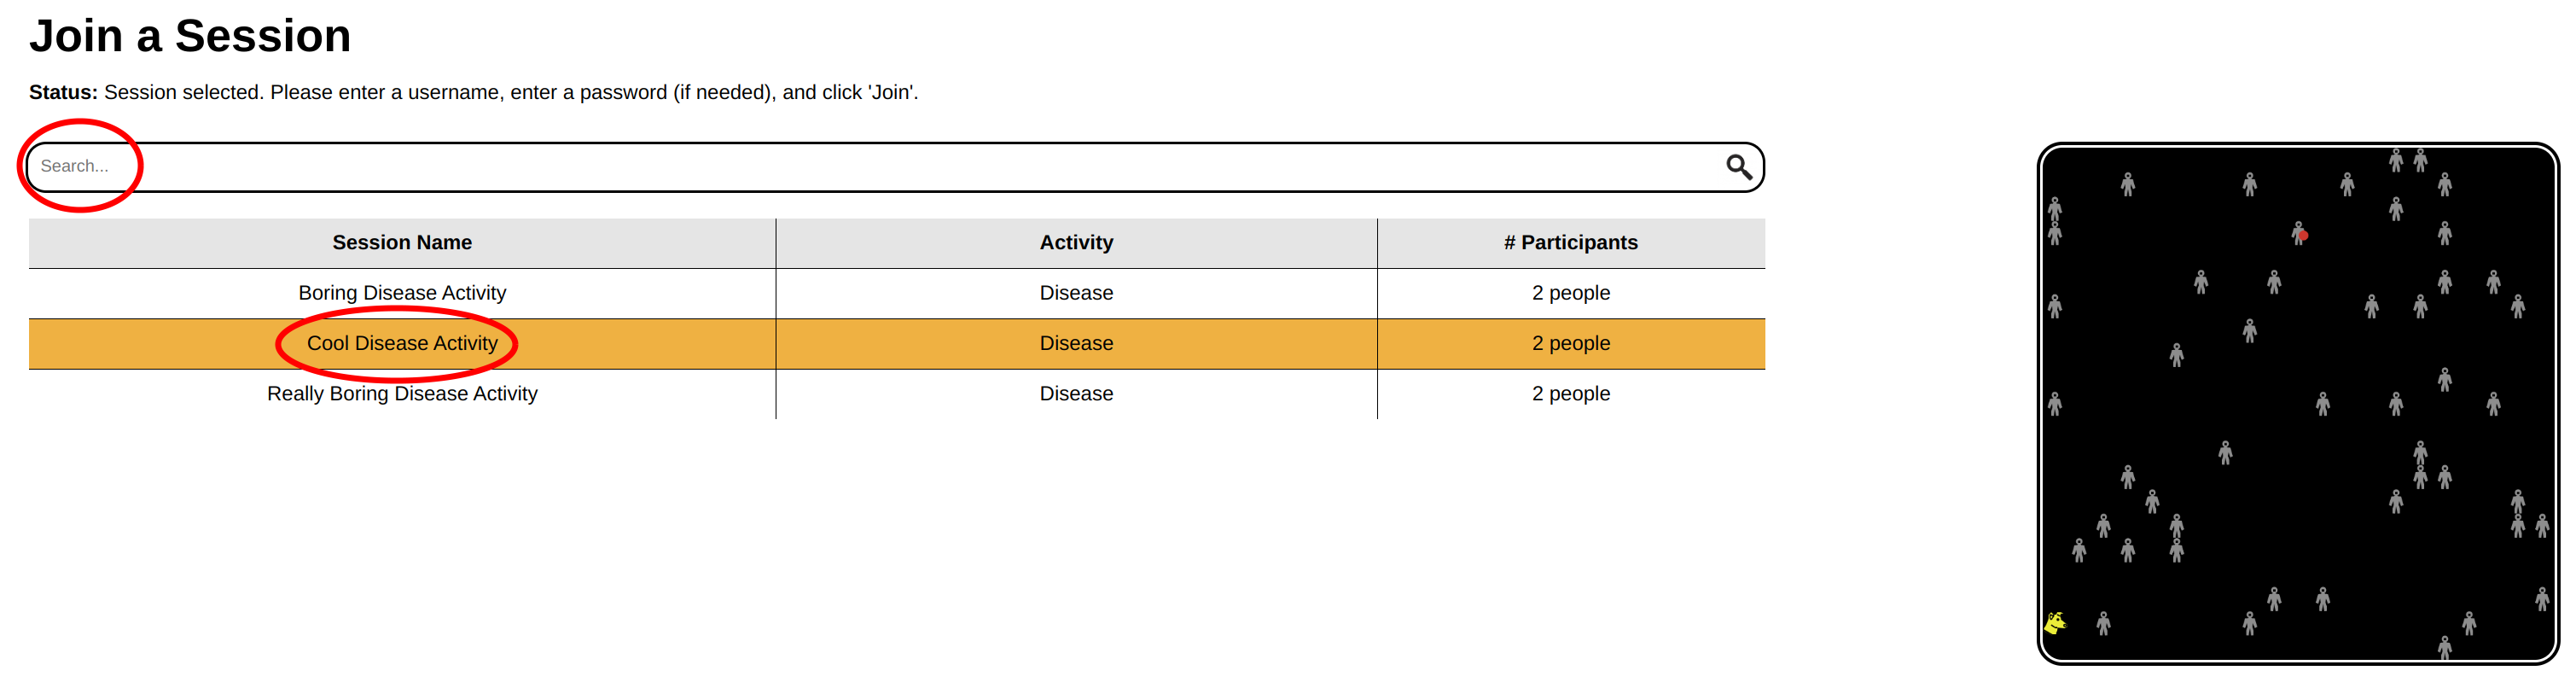
The other way to join a session involves loading the Join page, and finding a session in the list on the page. The list can be filtered by name or model name by inputting text to the "Search" bar above the list. Clicking a session's row in the list will select it, showing you a preview of the current state of the activity, on the right side of your screen.
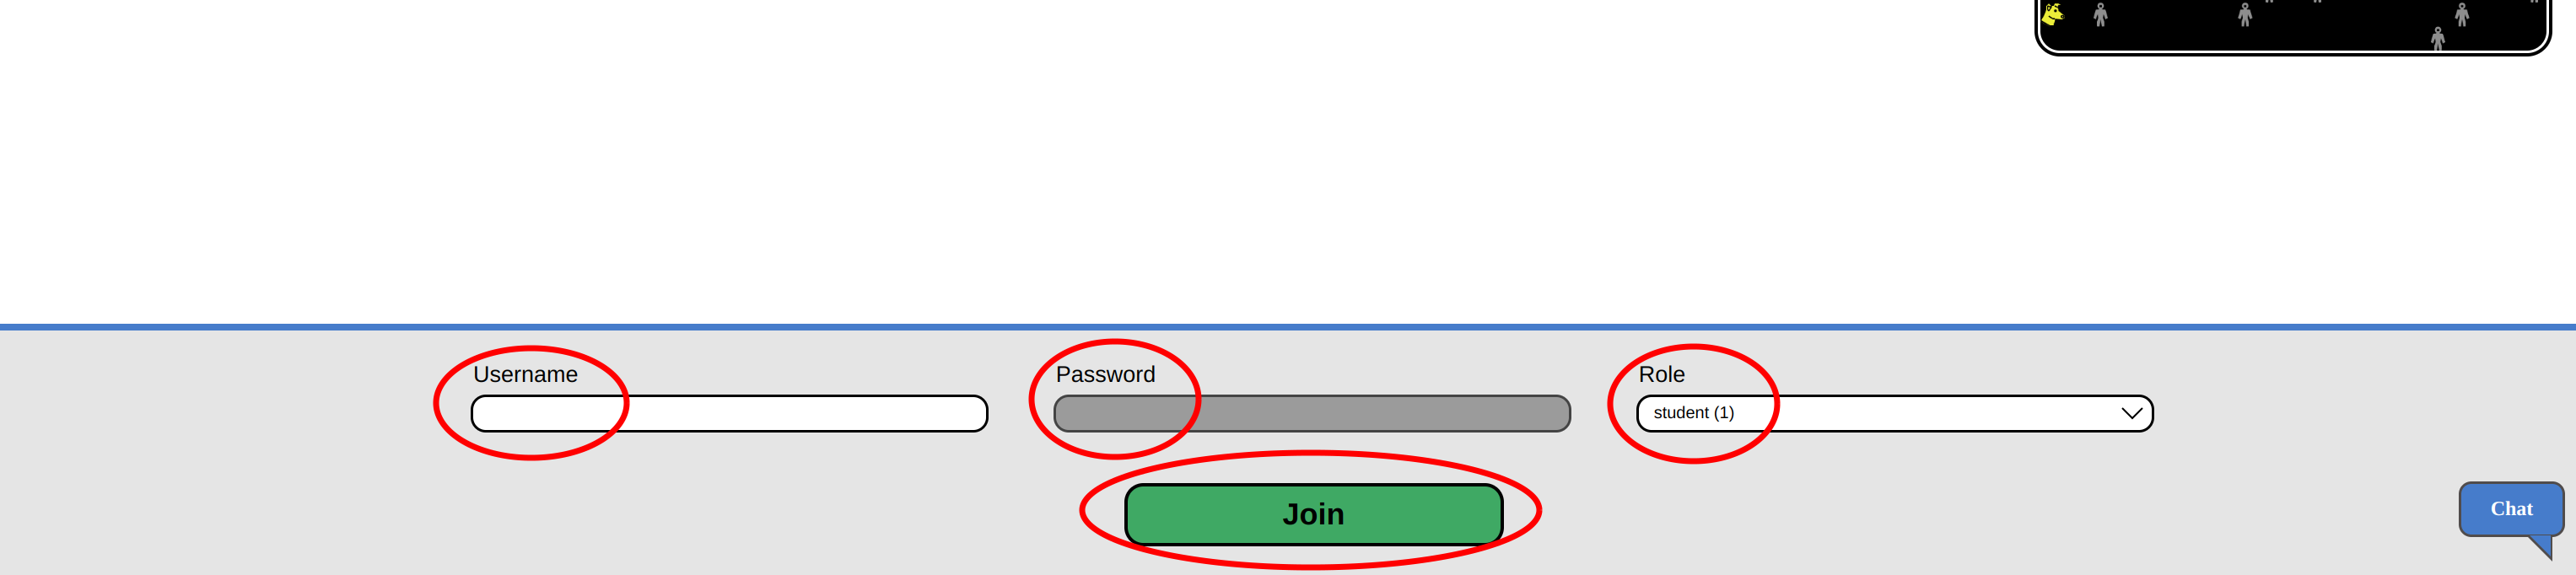
From there, you must enter the alias that you want to use in the session in the "Username" field (note: it must not be the same as the alias used by any other person currently connected to the activity). Then, if the session is password-protected, you must enter the password. If it is not password-protected, the "Password" field will be greyed out. Finally, must choose the role that you want to take on in the activity. The page will automatically try to pick a good role for you, but you may choose a role for yourself, as well. The number in parentheses next to a role's name indicates how many people are currently filling that role in the activity. If the number takes the format of X/Y, the Y value indicates the maximum number of clients that this activity allows to log in as this role. A role will be greyed out in the role list if it is full.
Once you have an activity selected in the session browser, and all of your requisite information filled out to your liking, click "Join" at the bottom of the page to join the activity.
If you are having a tough time finding or connecting to a session, you may find it useful to chat with someone for help. There is no guarantee that anyone will see your message or be available to help you, but if you would like to try chatting, you can click the "Chat" bubble in the bottom-right of the screen, typing a message, and pressing Enter/Return. You may see "Census" messages pop up in the chat box periodically, which serve to inform you of how many users (including yourself) are currently connected to HubNet Web.
Authoring an activity
Documentation on the authoring tools for HubNet Web can be found here.
I have a model that I like from the desktop version of HubNet. Can I load it up in HubNet Web?
No, you must convert/configure it for use in HubNet Web first. See the next section for how to do so.
Converting an existing model
A tutorial on how to convert existing HubNet/NetLogo models to work in HubNet Web (including a start-to-finish video guide) can be found here.
I tried opening a teacher client and student client, but the student client doesn't update. What's going on?
One property of modern web browsers is that browser tabs are given reduced CPU resources when they are not selected. If you open the teacher interface in one tab, and then open the student interface in another tab of the same window of the same browser, the student client will not be able to see live updates of the activity, because the tab that is not being focused will not be getting resources. Solving this issue is as simple as putting each client in its own window of your browser. This way, the browser will consider both tabs to be "foregrounded", and will dedicate resources to both of them.
Which browsers are supported?
Nearly all reasonably-modern browsers are supported, except for versions of Firefox before Firefox 111. Whether on a desktop, laptop, Chromebook, or mobile device, modern web browsers are expected to run HubNet Web well.
What are the internet connection requirements?
When it comes to joining an activity, the connection requirements are incredibly minimal, and should not be an issue (beyond the connection requiring a basic level of stability).
However, hosting an activity can be burdensome on your internet connection. It's not possible to give a simple rule for what strength of connection you might require, because the issue is one of how much data needs to be broadcast per second. This will increase for each additional client who has connected to your activity, and will also increase for each additional agent experiencing frequent changes in the course of running your activity. The host's computer and connection will almost always be the bottleneck for an activity's performance, so the more powerful the host's specs, the better.
I found a bug! Where can I report it?
Please e-mail us here with a description of what you did to cause the bug, what you expected to happen when you did it, and what unfortunate thing happened instead.